
Okay. I have a problem. That problem is my desk. I swear that it is messing with my creative productivity. It's true! A messy work environment makes you less motivated to start projects because you have to clean first before even starting. Who wants to clean? Also, it's harder to find things when you're messy. And finally, I can't even sit at it. There's nowhere to put my feet. It's a serious problem.
 |
| Here's another angle in case you don't appreciate the full mess |
As you can see, it's looking cuhrazy! There's a giant pile of mail, random frames taking up space, my laptop, tape, paper clips, remote controls... They are all fighting for space on the surface of my desk (and let's be honest, underneath it, too). Never to fear, though. I have a plan (as always). I am going to add two shelves: one to put my new filing system (just adding everything to binders in protective sleeve covers) and relieve my poor subwoofer of my hardcover books, and the other one to put my sewing machine and sewing basket (to make more room on the floor for my legs and feet). I am also going to hang a peg board above my desk. It will house my mail organization system, my office supplies, my cameras, and my paper cutters, which are ALWAYS in the way of something. Essentially, I want to take the surface of my desk right now and make it vertical.
BUT, I'm me, and I can't simply hang up a peg board, now, can I? Nooooooooooooo. I have to make it look pretty. So, I'm going to paint it and put a frame on it, then buy cutesy filing stuff, and, lucky you (not really), I'm gonna share how I did it!
THE PEG BOARD
My husband and I decided on 4' x 2' pegboard. We also bought some gorgeous baseboard to be cut and pasted as a frame. Unfortunately, Home Depot only carries 4' x 8' peg board sheets, so we bought the giant piece and had them cut 4 sheets at 4' x 2' (total for the peg board was about $14). For the baseboard, we bought two 3' pieces and two 5' pieces, totaling about $21. In addition to the peg board and the baseboard, we bought a can of metallic silver spray paint (about $3.50), a sample of the grey color we wanted for the peg board (about $3-5), Gorilla brand wood glue (about $5), two nuts, two hex bolts, 4 washers, metal strapping ($4), and 14 spring clamps (about $1.50 each). So, my peg board set me back about $68 (at least $15 of it for the spring clamps are reusable). Also, we spent about $45 for the things that went onto the peg board.
First, we glued two pieces of peg board together and clamped them with the spring clamps. Then we painted the peg board with the grey sample sized paint. Pictured below is the painted product with some touch up gluing on one side:

THE FRAME
To make the frame, we cut the baseboard into four pieces with 45 degree angles on both sides using a miter box and a hacksaw. Make sure your pieces end up looking like trapezoids, not parallelograms. We didn't really measure our pieces. We just eyeballed one piece, cut it, then made sure the opposing side perfectly matched, i.e. the two short sides were a perfect match and the two long pieces were a perfect match. Next, we spray painted them with the silver spray paint. I must say, I'm really impressed with RustOleum. I've spray painted many things, but I've never had such a well working nozzle. NO DRIPS! I can't tell you how impressed I was. The "comfort tip" nozzle was pristine when I was done, and the paint didn't get all over my spraying finger or run down the side of the can. I'm sticking to RustOleum from now on.
 |
| My painted to-be peg board frame among my Rockband/mini guitar pile |
PUTTING IT ALL TOGETHER
Before we could glue the frame onto the peg board, we had to attach the metal straps. That way, the frame can cover some of it. We put the hex bolt through one of the washers, the metal strap, then the painted surface of the peg board. Behind the board, we slipped the bolt through the other side of the metal strap, the other washer, then fastened with the nut.
 |
| Behind the painted surface of the peg board. |
 |
| Et voila! Metal straps fastened. |
Now, we just glue and clamp the frame onto the peg board right on top of those metal straps. Our strategy was to first put glue on one piece, then place it on the peg board. Working together, we put the other three (unglued) pieces on the board and positioned them, so that a full frame is formed, making sure all the corners are lined up flush, and the frame is straight compared to the peg board holes. We then clamped down the piece with the glue. Once that piece is clamped, it was considered a guide for the other pieces, so we glued the other three pieces at the same time, with me holding the corners flush as my hubby clamped the pieces. We then wiped off all the excess glue that oozed out.

Once the glue is dried and cured (24 hrs), we hung up the frame. We cut slits in our curtain so that the metal straps can be hidden underneath the curtain where it curves around the curtain rod. See the finished product!


The mail and paper files and one of the baskets were bought from Target and had to be attached with ribbon. The baskets holding our cameras and tape dispenser were from Home Depot and were actual peg board accessories. The ribbon spool was actually two simple peg board hooks turned sideways with a 10" bungee cord stretching in between. I stopped the hooks from slipping towards the peg board with rubber bands. Not pictured is a basket to hold my paper cutters at the empty spot at the top of the peg board.
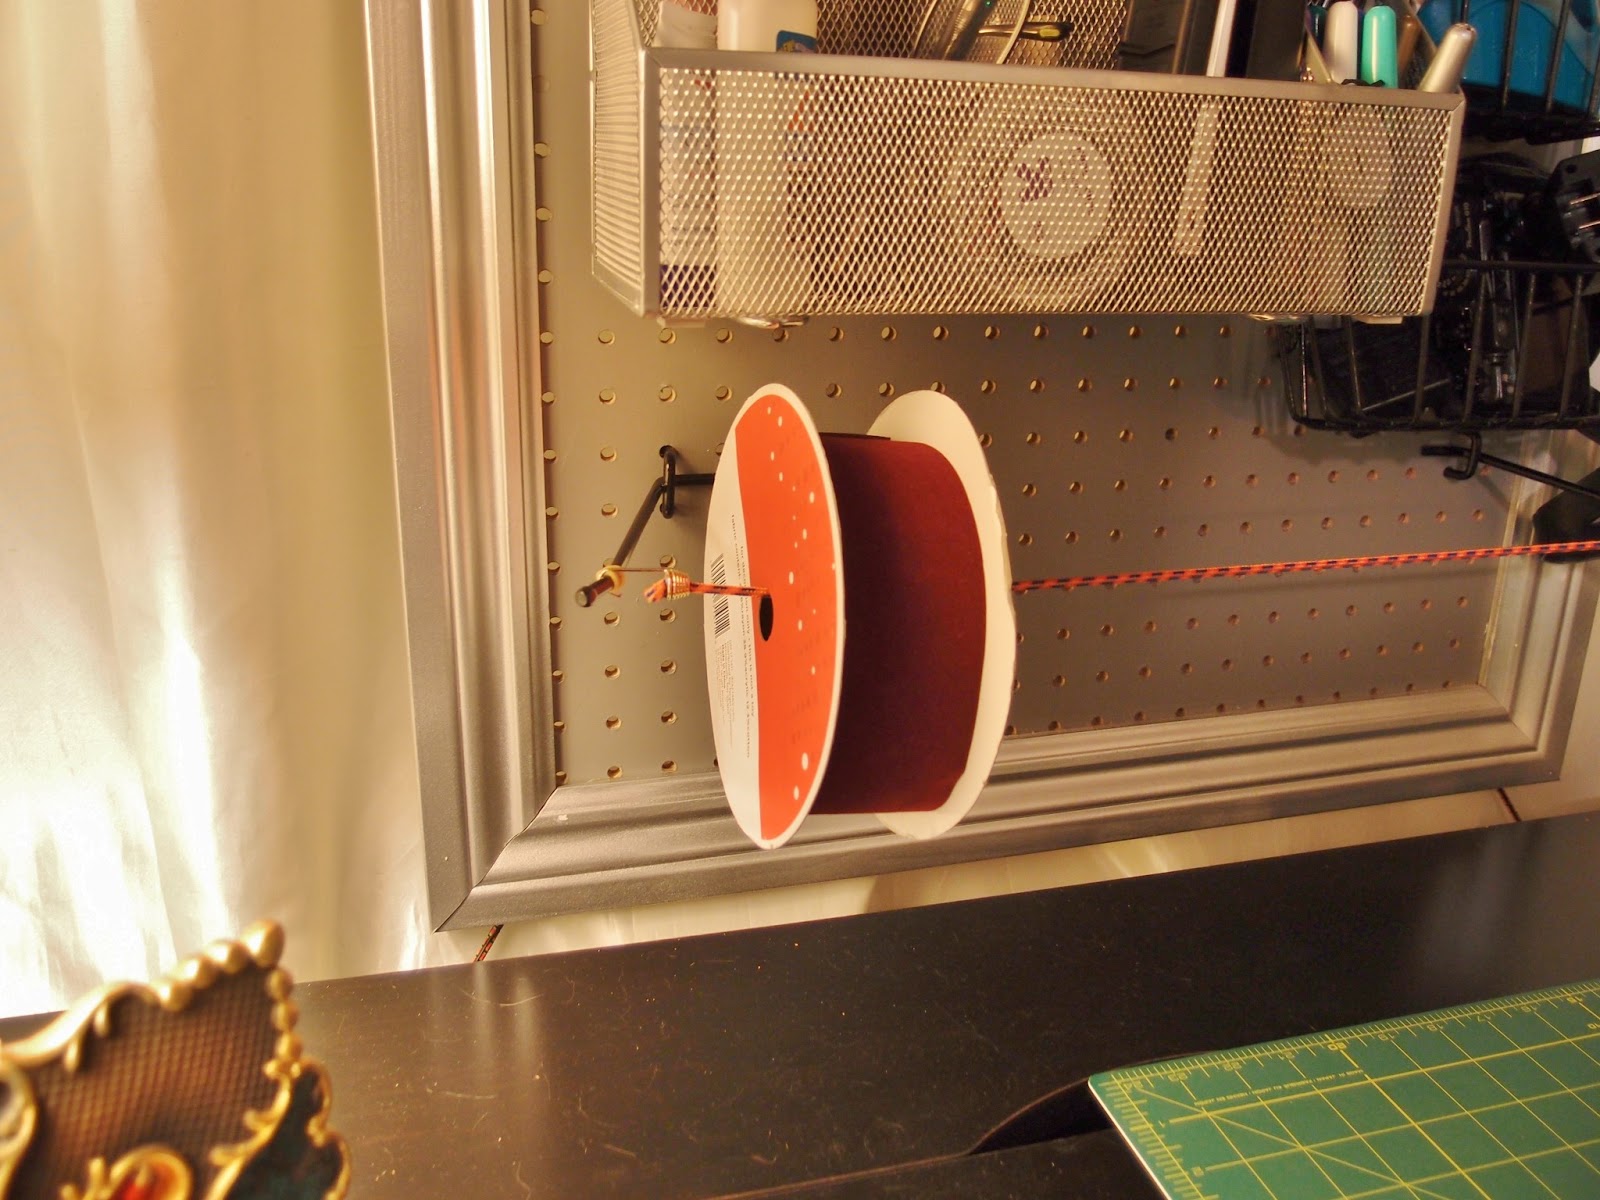 |
| Close up of my jerry-rigged ribbon spool. It will look much more impressive when I have more ribbons on it. |
This project took us about a month to complete. If we were really focused on it, I'd say it would be a 1 hour a day for a week commitment. Painting and gluing takes no more than an hour, but it's the waiting period for the paint/glue to cure that causes it to stretch out a few days. Now see how organized and pretty my desk area is?


I like the idea that you used metal straps to guarantee the stability of the bolts. I’m sure that the metal straps were fastened securely. I’ve been thinking of creating a peg board, so this was very timely. Thanks for the mini-tutorial too; this will make the project easy!
ReplyDelete-Carl Patten
Hi Carl! I'm glad my tutorial will help you out. Thank you so much for checking out my blog, and good luck with your project!
ReplyDelete